GCP無料枠を使ってSoftEther VPN Serverを立ち上げる

カフェやコワーキングスペースで作業をする際に無料wifiを使うことがあり、wifiの盗聴防止のために専用VPNが欲しかったのでGCP上にSoftEther VPN Serverを構築した。
GCE VMインスタンス作成
GCPには永続無料枠があるので、f1-microインスタンスを作成することに。
| 項目 | 内容 |
|---|---|
| OS | Ubuntu 18.04.2 LTS |
| ディスクサイズ | 30GB |
| マシンタイプ | f1-micro(vCPU x 1、メモリ 0.6 GB) |
| ゾーン | us-west1-b |
| 外部 IP | 新規作成して割当 |
| IP転送 | on |
| ネットワークタグ | https-server, vpn |
IP転送の設定はVM作成時にしか設定できず、かつ設定場所が分かりづらいので注意。
「ネットワーキング」=>「ネットワーク インターフェース」=>「IP転送」にある。

VPC Firewall Rule作成
VPNサーバで利用するPortの上り通信許可のルールを追加する。
ターゲットタグにvpcを設定しておくことでVMインスタンスで設定が有効になる。
| protocol | port | 用途 |
|---|---|---|
| tcp | 5555 | Softether |
| udp | 500,1701,4500 | L2TP/IPSec |
| udp | 1194 | OpenVPN |

SoftEther設定
- SoftEtherインストール
サーバにssh接続し、以下を実行。
sudo su -
apt install -y bridge-utils gcc make
cd /tmp/
wget https://github.com/SoftEtherVPN/SoftEtherVPN_Stable/releases/download/v4.29-9680-rtm/softether-vpnserver-v4.29-9680-rtm-2019.02.28-linux-x64-64bit.tar.gz
tar -xvf softether-vpnserver-v4.29-9680-rtm-2019.02.28-linux-x64-64bit.tar.gz
cd vpnserver/
make
cd ../
mv vpnserver/ /usr/local/
cd /usr/local/vpnserver/
chmod 600 *
chmod 700 vpncmd vpnserver- 自動起動設定
vi /etc/systemd/system/vpnserver.service

[Unit]
Description=SoftEther VPN Server
After=network.target network-online.target

[Service]
ExecStart=/usr/local/vpnserver/vpnserver start
ExecStop=/usr/local/vpnserver/vpnserver stop
Type=forking
RestartSec=3s

[Install]
WantedBy=multi-user.target- SoftEther起動
systemctl daemon-reload
systemctl enable vpnserver.service
systemctl start vpnserver.service- 管理者パスワードの設定
GUIの管理ツールからアクセスする際にパスワードが必要だったので、初回のみCLIから管理者パスワードを設定。
ServerPasswordSetで設定できる。
cd /usr/local/vpnserver/
./vpncmd

vpncmd command - SoftEther VPN Command Line Management Utility
SoftEther VPN Command Line Management Utility (vpncmd command)
Version 4.29 Build 9680   (English)
Compiled 2019/02/28 19:22:54 by yagi at pc33
Copyright (c) SoftEther VPN Project. All Rights Reserved.

By using vpncmd program, the following can be achieved.

1. Management of VPN Server or VPN Bridge
2. Management of VPN Client
3. Use of VPN Tools (certificate creation and Network Traffic Speed Test Tool)

Select 1, 2 or 3: 1

Specify the host name or IP address of the computer that the destination VPN Server or VPN Bridge is operating on.
By specifying according to the format 'host name:port number', you can also specify the port number.
(When the port number is unspecified, 443 is used.)
If nothing is input and the Enter key is pressed, the connection will be made to the port number 8888 of localhost (this computer).
Hostname of IP Address of Destination:

If connecting to the server by Virtual Hub Admin Mode, please input the Virtual Hub name.
If connecting by server admin mode, please press Enter without inputting anything.
Specify Virtual Hub Name:

Connection has been established with VPN Server "localhost" (port 443).
You have administrator privileges for the entire VPN Server.

VPN Server> ServerPasswordSet
VPN Server Manager設定
↓より「SoftEther VPN Server Manager」をダウンロードして手元のPCで起動。
- Manage Virtual Hub => Manage Usersで適当なユーザを作成
- Manage Virtual Hub => SecureNATでEnable SecureNAT
- macやiPhoneから接続する場合はEnable L2TP Server Functionにチェックを入れる

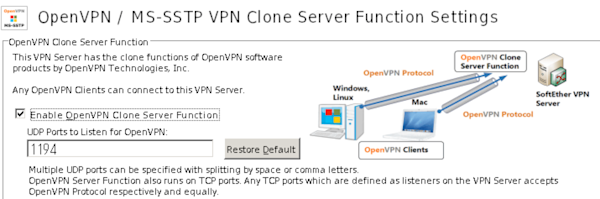
- Androidから接続する場合はEnable OpenVPN Clone Server Functionにチェックを入れる
macからVPNサーバに接続
- 「システム環境」=>「ネットワーク」=>「+」を選択して「L2TP over IPSec」で作成
- VPNサーバに設定したユーザ情報を指定すれば接続できる

これでGCP上にVPN Serverを立ち上げPCからVPN接続できるようになった。
GCP無料枠を利用しているためVMインスタンスの利用料はかからないが、ネットワーク通信量は従量課金になるので注意が必要。
とはいえカフェで数日作業する分であれば数十円(100円以下)程度だったので、固定のVPSを借りるよりは安上がり。